CouchDB 3 setup on Ubuntu 18.04
February 29, 2020
What is CouchDB
CouchDB is a HTTP + JSON document database which has some unique syncing features that makes it ideal for offline-first applications like Upcount.
Apache CouchDB has started. Time to relax.
CouchDB replication uses the same REST API all clients use. HTTP is ubiquitous and well understood. Replication works incrementally; that is, if during replication anything goes wrong, like dropping your network connection, it will pick up where it left off the next time it runs. It also only transfers data that is needed to synchronize databases.
As it also has built in conflict resolution it makes it an ideal database for our needs - syncronizing data between multiple locally installed offline-first applications. As a side benefit a backup of all your data can be kept on the server in case anything should happen to your local data.
Setup
These setup steps assume a fresh install of Ubuntu 18.04.
System update
apt update
apt upgrade
Installing CouchDB
Enable the Apache CouchDB package repository.
sudo apt-get install -y apt-transport-https gnupg ca-certificates
echo "deb https://apache.bintray.com/couchdb-deb bionic main" | sudo tee -a /etc/apt/sources.list.d/couchdb.list
Install the CouchDB repository key & package.
sudo apt-key adv --keyserver keyserver.ubuntu.com --recv-keys 8756C4F765C9AC3CB6B85D62379CE192D401AB61

apt update
apt install -y couchdb
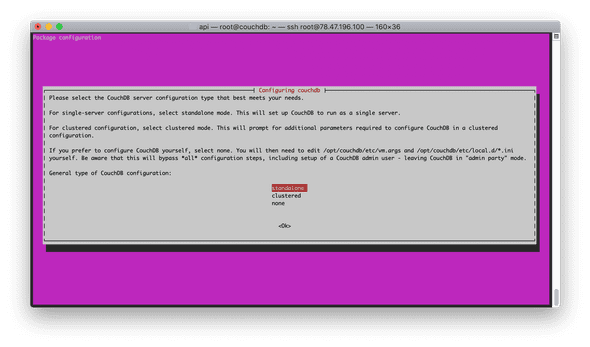
We will be doing a standalone setup so select standalone from the configuration type and 127.0.0.1 as the bind address. The last step of the installation askes you to choose an admin password.
Verify CouchDB was installed and started.
service couchdb status
curl localhost:5984
Output to the cURL command shoul be similar to the following.
{
  "couchdb": "Welcome",
  "version": "3.0.0",
  "git_sha": "03a77db6c",
  "uuid": "7415c1c90580fd59da00a1af4250df90",
  "features": [
    "access-ready",
    "partitioned",
    "pluggable-storage-engines",
    "reshard",
    "scheduler"
  ],
  "vendor": {
    "name": "The Apache Software Foundation"
  }
}
NGINX & LetsEncrypt
As CouchDB works over HTTP we will be putting a NGINX proxy in front of it and provisiong a HTTPS certificate from LetsEncrypt for secured connections to the CouchDB database.
NGINX
Install NGINX, make sure it’s running and remove the default site configuration.
apt install nginx
service nginx status
rm /etc/nginx/sites-enabled/default
service nginx reload
LetEncryt
apt update
apt install software-properties-common
add-apt-repository universe
add-apt-repository ppa:certbot/certbot
apt update
apt install certbot python-certbot-nginx

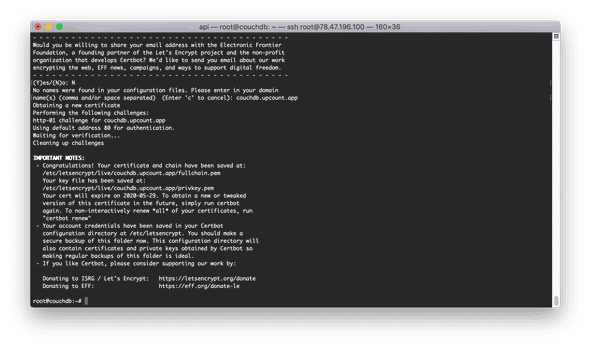
certbot certonly --nginx
Follow the instructions on screen to configure your certificate & domain.
Generate DH parameters.
openssl dhparam -out /etc/nginx/dhparam.pem 4096This is going to take time. 2048 could be used but SSL Labs requires a 4096 bit key to get a 100% score for Key Exchange.
Test automatic renewal.
sudo certbot renew --dry-runProxy configuration
Create our domain specific proxy configuration for NGINX.
nano /etc/nginx/sites-available/couchdbserver {
listen 443;
server_name couchdb.yourdomain.com;
ssl_certificate /etc/letsencrypt/live/couchdb.upcount.app/fullchain.pem;
ssl_certificate_key /etc/letsencrypt/live/couchdb.upcount.app/privkey.pem;
ssl on;
ssl_session_cache shared:SSL:10m;
ssl_session_timeout 10m;
ssl_protocols TLSv1.2 TLSv1.1 TLSv1;
ssl_ciphers 'kEECDH+ECDSA+AES128 kEECDH+ECDSA+AES256 kEECDH+AES128 kEECDH+AES256 kEDH+AES128 kEDH+AES256 DES-CBC3-SHA +SHA !aNULL !eNULL !LOW !kECDH !DSS !MD5 !RC4 !EXP !PSK !SRP !CAMELLIA !SEED';
ssl_prefer_server_ciphers on;
ssl_dhparam /etc/nginx/dhparam.pem;
location / {
proxy_pass http://localhost:5984;
proxy_redirect off;
proxy_set_header Host $host;
proxy_set_header X-Forwarded-For $proxy_add_x_forwarded_for;
proxy_set_header X-Forwarded-Ssl on;
}
location ~ ^/(.*)_changes {
proxy_pass http://localhost:5984;
proxy_redirect off;
proxy_buffering off;
proxy_set_header Host $host;
proxy_set_header X-Forwarded-For $proxy_add_x_forwarded_for;
}
}Please note to change the couchdb.yourdomain.com to the domain you are using.
Link configuration to enabled sites & reload NGINX to enable the configuration.
ln -s /etc/nginx/sites-available/couchdb /etc/nginx/sites-enabled/couchdb
service nginx reload
Go to your CouchDB installation URL to confirm the setup.
Fauxton access
To access Fauxton the CouchDB administration interface continue to https://couchdb.yourdomain.com/_utils/#login.
Use username admin with the password configured during CouchDB installation.
Secure defaults
CouchDB used to be unsecure by default as everybody had administrative access before version 3.0. This was called Admin party - I’m quite happy that this party has ended with version 3.0 and the DB is secure & locked down by default.
Meaning that the admin password you configured during setup is the only user able to create new databases by default. Also note that All databases are now created by default as admin-only.
Although admin party sounds like fun it’s better to have secure defaults.


